Pixomondo deliver Academy Award winning Hugo VFX with Nuke, Ocula and Mari
Pixomondo brings Hugo’s golden era to life with Nuke, Ocula and Mari
To realise his unique artistic vision on Hugo, the epic 3D adventure, Martin Scorsese turned to international visual effects company Pixomondo. Since its release the film has received wide critical acclaim and earned the team its first ever Academy Award® nomination and win.
Pixomondo has studios in Los Angeles, Baton Rouge, Burbank, London, Shanghai, Beijing, Berlin, Frankfurt, Munich, Stuttgart, Hamburg and Toronto and has built a reputation for delivering efficient and collaborative workflow across datelines and time zones. The company’s 24/7 global pipeline was instrumental in completing Hugo on time and within budget.
Notable recent credits include visual effects work for Super 8, Fast and Furious 5, Red Tails and Sucker Punch. They are also involved in Marc Webb’s franchise reboot, The Amazing Spider-Man.
Independent industry veteran Rob Legato, who has worked with Martin Scorsese on multiple films in the past, took up the reins as Hugo’s Visual Effects supervisor working closely with the Pixomondo team.
We caught up with Rob and Pixomondo DFX supervisor, Alex Henning to uncover how Foundry’s software helped them achieve such great results.
With a total of 800 visual effects shots making the final cut and the added pressure of working with stereo footage, the team had to pull out all the stops to ensure the pipeline was set up to deal with Hugo’s scale and complexity. At the peak of the project, there were 100 compositors working across Pixomondo’s global sites, with all of the compositing work being carried out in Nuke.
“I was working at Digital Domain when Nuke was first developed and it’s great to see it gaining such momentum in the industry. The ability to set up a pipeline across sites and even countries in a common language is a huge plus,” comments Legato.
Henning elaborates: “Nuke is the ideal tool for Pixomondo due to the customization possibilities. Each facility has bespoke needs and every individual project has more unique requirements. Nuke gives us the flexibility that we need to deal with this.”
Creating high-quality stereo
For revered director Martin Scorsese, Hugo represented more than just a shift in genre. This was a chance for him to pay homage to the early cinema era he adores and to fulfill his dream of making a film in 3D.
Hugo was conceived to be seen in stereo, so there was a lot riding on the quality and depth of the 3D. Though Pixomondo had worked on stereo projects before, including some shots on Green Hornet, Hugo far exceeded the demands of previous ventures.
Henning did some stereo work in After Effects a long time ago, but this time around he was able to really get to grips with it in a Nuke context. He said: “We were able to do a lot within Nuke to enhance stereo. It’s great and very intuitive.” To handle the inevitable issues thrown up by live action stereo filming, he also introduced Ocula into the pipeline.
The Ocula toolset works within the Nuke environment to solve common problems with stereoscopic imagery including alignment and disparity boosting productivity and ultimately helping to deliver a more rewarding 3D viewing experience.
Using the powerful combination of Ocula and Nuke really allowed the team to innovate and develop new approaches. The film features a series of flashbacks which required an older, grainy look.
Henning said: “DOP Bob Richardson wanted to develop an old stereo film look that would handle grain a bit differently. I used the Ocula disparity map to create a depth map of the imagery and then used it to map the grain at depth onto each character, using the same pattern in each eye but offset horizontally according to the disparity map. This created grain that sticks to objects as opposed to just hanging in space. The effect was created entirely in Nuke and Ocula.”
The team also made effective use of Ocula 2.2’s colour matcher to solve polarisation issues with the stereo shots.
Being able to comp on the spot in stereo came in very handy
The advantages of Nuke and NukeX
Pixomondo has a mix of Nuke and NukeX licenses and were able to take advantage of the additional features in NukeX on the project. Henning explains: “We made use of the NukeX licenses rather than using additional external tools. It was nice to be able to stay within the environment because of the scriptability and automation it provides. With a good profile set up there’s a lot you can easily do over and over - such as batch for proxy and degrains, or using lens distortion nodes to undistort plates. The new DeNoise feature in 6.3 made a huge difference with plate preparation. It’s a vast improvement on the previous incarnation.”
He continues: “My favourite feature in NukeX is lens distortion - I’m a huge fan of that workflow. Yannix, who we outsourced matchmoving to, delivered back Nuke lens distortion nodes to go with every matchmove. Cameratracker is good for composite shots where you want a track, but are not necessarily going to need elements from Maya or Max. You can do the whole track in NukeX. I see the scope expanding and it becoming our first choice as The Foundry improves it, particularly for stereo solves. Improving the camera export capabilities would make it a winner for me.”
On set with Nuke and Ocula
With so much of the film’s story hinging on the spectacle itself, it was vital that the team were able to easily comp rough stereo versions of the footage during the shoot.
Legato and Henning spent three months working together on the Hugo set. “Alex and I used Nuke, Ocula, and previz environments - rendered using actual camera data from just-captured takes - to turn around super fast stereo temps for Marty,” said Legato.
Henning adds: “Being able to comp on the spot in stereo came in very handy when Rob was shooting 2nd Unit. We could get Marty to sign off on something and move on to our next setup without wondering if he'd like what we just did.”
Nuke was also used on set to re-create motion picture autochrome examples and sophisticated 3D lookup tables. The footage was then played back on a laptop using an HDMI connection into a stereo monitor.
Nine of Pixomondo’s offices worked on Hugo. Supervised by Grossman, the LA office did the plate preparation work using Nuke and Ocula. Each shot was then broken down into individual jobs, which were allocated to the global Pixomondo teams depending on the skillset requirements for each shot. Henning comments: “It literally never stops. Coordinating is a full time job. Someone is always awake and working, and there’s something to review no matter what time you login.”
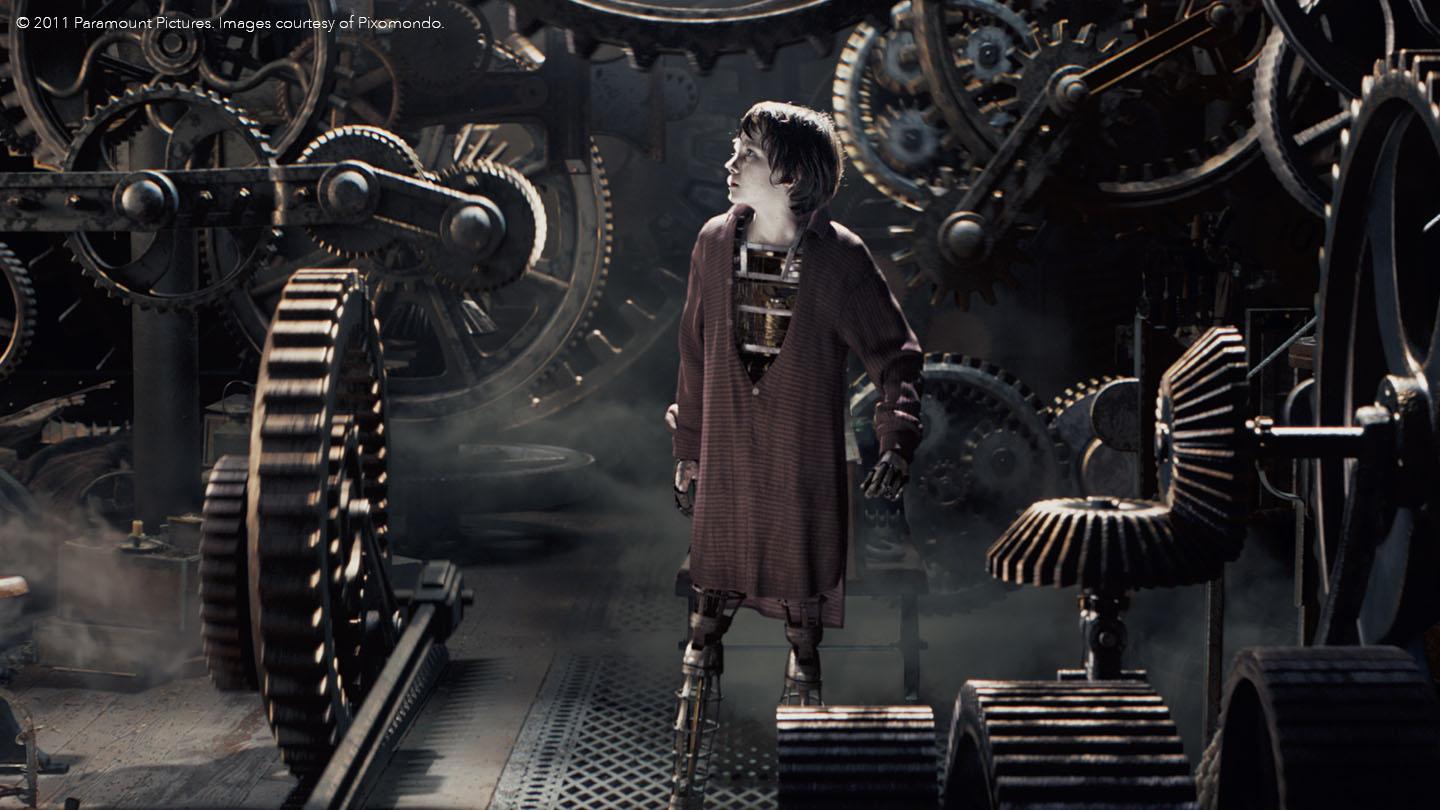
Specific locations were tasked with creating the film’s key sequences. Frankfurt worked on the sequence where Hugo turns into the Automaton in his dream, Stuttgart created the clip where Hugo is hanging from the clock hands outside of the station and Berlin did the train crash sequence.
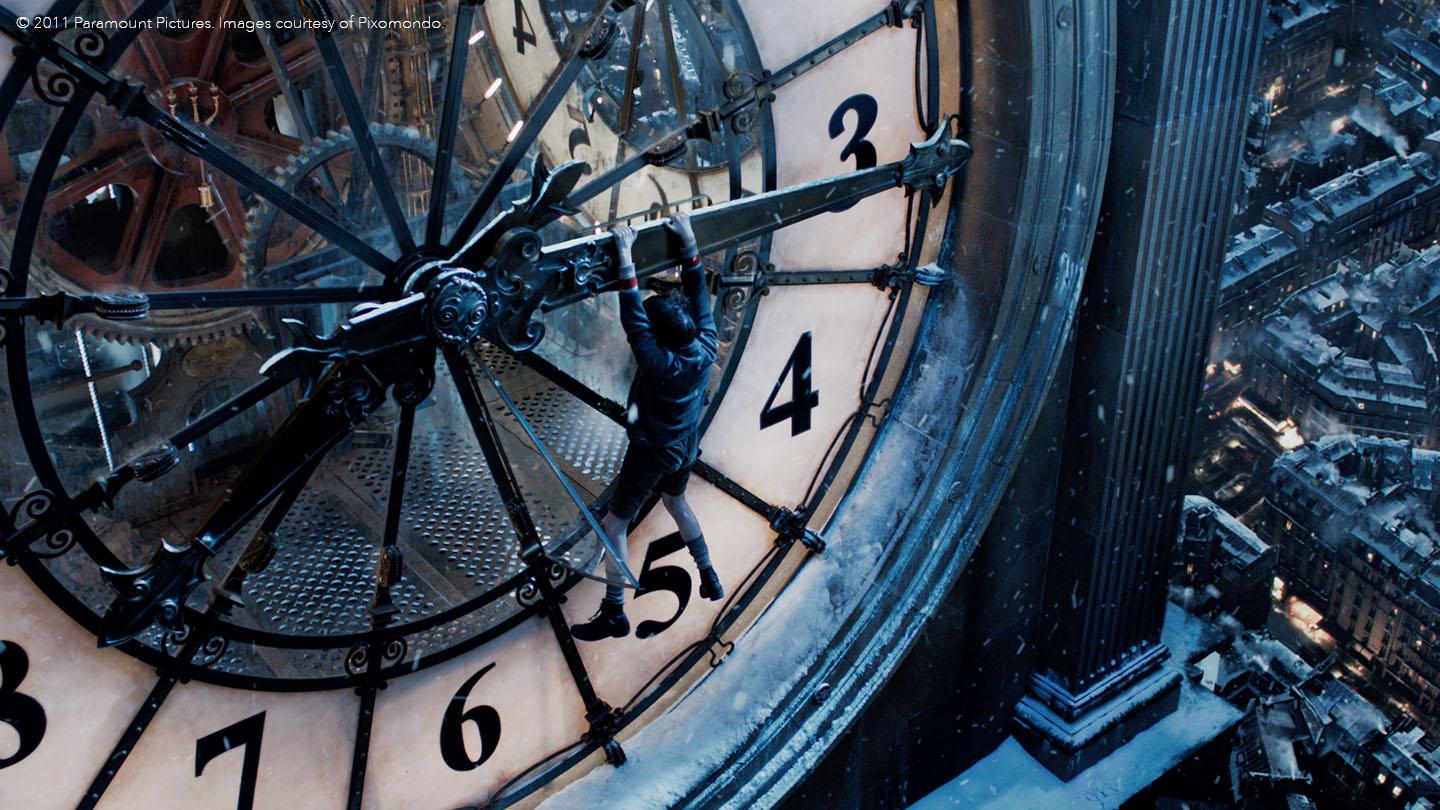
Using Nuke to create the opening sequence
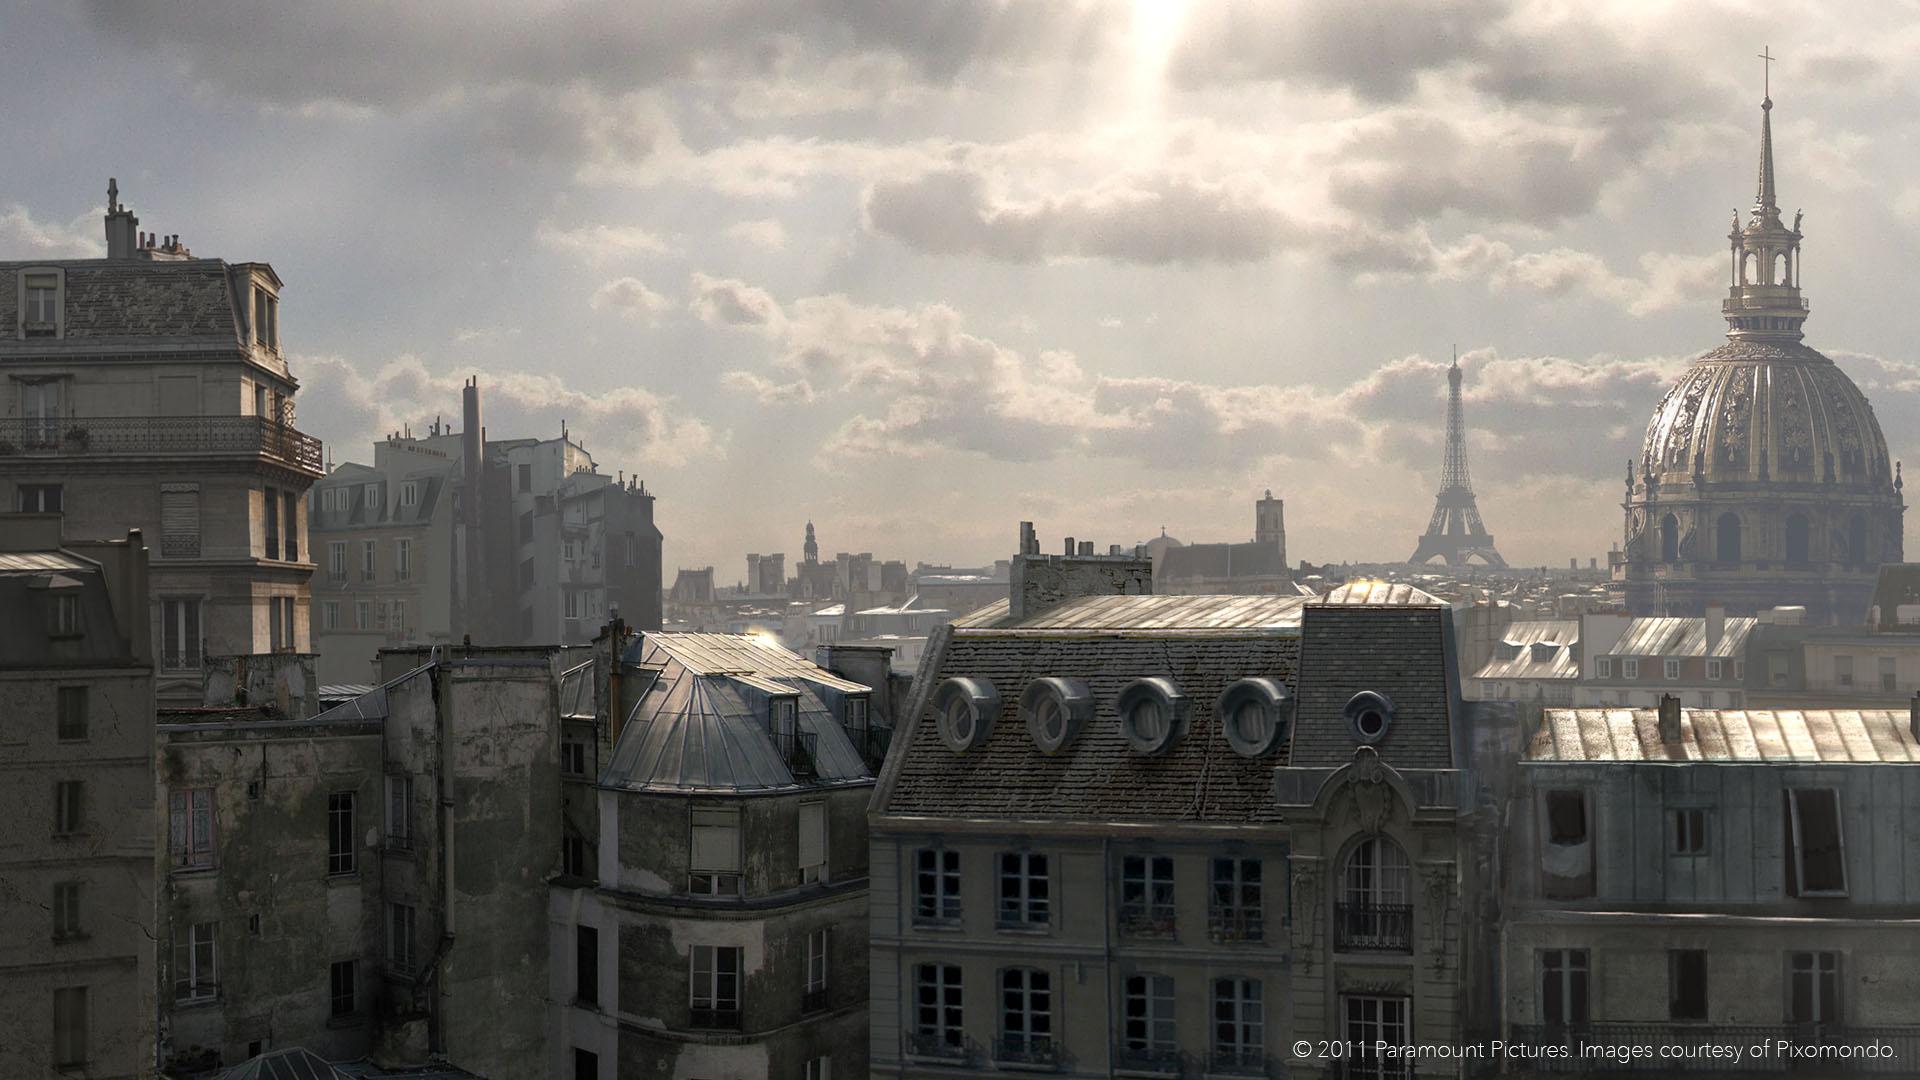
The London studio, where Henning spent time during post production, was responsible for creating the big opening shot. The impressive sequence pans over the Paris skyline before sweeping down into the station, weaving through the crowded platform, and finally up to Hugo’s watchful eye inside the station’s clock. To bring the scene to life, Pixomondo had to create the whole of Paris in CG from the ground up. In keeping with the Director’s vision, it was given a 1930s ‘studio back lot’ look.
Nuke played a key part in the creation of this sequence explains Henning: “In the iconic opening shot it was particularly challenging getting the people (shot in stereo on treadmills) into the train station platform. To do it we designed a hybrid reprojection system in Nuke to position, animate, and re-render stereo footage of our actors. This allowed us to retain intra-object depth while moving characters around in the scene and adjusting the overall stereo settings of the shot.”
A lot of the camera engineering on Hugo was also done in Nuke. Henning said: “I did the fly through of the train station with a stereo value that changes over the course of the shot. I started with an interaxial separation of 18 inches to give depth to the city, then ramped down to 2 inches as we enter the station and move down the platform, and then finally to 1 inch as the shot rises up to Hugo in the clock. We needed to blend in and out of the matchmove (set portion) while switching from toed-in cameras that work as the physical rig does to parallel cameras that use offset filmbacks to set convergence. I did all the camera engineering and maths in Nuke and then passed that off to other artists to re-create in Maya where we then rendered out CG elements.”
Introducing Mari to the pipeline
The London studio had only recently been established as the Hugo project was getting underway. This gave the asset team a fairly clean slate as it was looking to equip the artists with software.
Simon Britnell is the Asset Lead at Pixomondo’s London office. On Hugo he was responsible for London’s model and texture output as well as helping to manage assets created elsewhere in Pixomondo. His team handled most of the station interior extensions, the Automaton digital double, the majority of the vehicle, prop and railway rolling stock, as well as a lot of the intricate clock models. The team’s biggest challenge though, was creating the opening fly in to the station over snowy Paris.
Britnell comments: “We tried to be flexible with the artists preferences on software, both 2D and 3D, but ultimately everything is piped in through Maya (V-Ray) and then onto Nuke. As well as myself, we had one dedicated texture artist who used Mari extensively throughout the show.”
Pixomondo used photogrammetry modeling and texture projection techniques on many of the assets on Hugo. Mari's straightforward photo reference projecting and seam blending capabilities proved to be one of the software’s primary benefits.
Though Mari was fairly new to Britnell on Hugo, he quickly recognised that it had many more advantages under the hood. He explains: “It’s so easy to preview color, spec and bump in Mari. I can rehearse how to get the most out of my textures before the render and even explore which options from a selection of channels will yield the best results for the lookdev team. Having the shader system to easily tune the results also gives me a good understanding of how to make maps better – or work better together. I practiced on a few detailed vehicle models for Hugo. Because of the relative scale you would be hard pressed to see it in the final shot, but I got really great results from the Mari viewport. If an audience can’t tell its not real camera footage then I know the texturing job has gone well.”
I got really great results from the MARI viewport. If an audience can’t tell its not real camera footage then I know the texturing job has gone well.
He also cites the ability to manage all his texture work in one package as a major benefit. “It makes things easier when it comes to updates, change requests or simply returning to a task after a break. Your project holds all your references and you can quickly test the status of work and export updates with relative ease. New features like snapshots will help this further on future shows.”
“I personally used Mari 1.1v2 on Hugo. When I did finally upgrade to Mari 1.3 I found the speed increase, evident in baking and switching between shaders, a mini revelation. With every release Mari is becoming more advanced,” he adds.
“I had years (decades) of reliance on Photoshop, which has been fundamental to a texture workflow and I had also previously used Cinema 4Ds Bodypaint for texture projection and seam fixes. I confess I was skeptical that artists could make a successful transition to Mari as their primary application. Photoshop still has a part to play – as does any modeling package that offers integrated texture painting - but Mari is becoming more of a complete texturing solution with each release and seems set to become the foremost dedicated texturing tool for film VFX. Going forward, we plan to implement a much more robust process for photo modeling and utilize the evolving Mari/Nuke connection to better supply model and texture assets through to compositing, should they be required,” concludes Britnell.
Working with Foundry
Foundry’s Chief Scientist, Simon Robinson went on set with Grossmann, Legato and Henning during the filming of Hugo in London. Giving support to the studios using the software on projects like Hugo is an important part of how The Foundry works. This involvement allows the company to learn and explore ways of improving its software offerings.
Henning comments: “It’s important to me that a company is responsive and Foundry certainly are. We felt very well supported by the team and they were a great help throughout the show. You guys have a very collaborative spirit.”
Hugo proved to be instrumental in refining the development of the latest version of Ocula. The Pixomondo crew were very active during the beta of Ocula 3.0. As a result, new features such as stereo re-timing have been introduced to enhance future stereo projects.
Alex and Rob were recently awarded a VES for Outstanding Supporting Visual Effects in a Feature Motion Picture and the film has also been honored with the Best Visual Effects award at the 2011 International Press Academy Satellite Awards. As the team celebrates this recognition as well as the Academy Award for Best Visual Effects, Foundry is proud to have its name associated with such a groundbreaking movie.
The film is a homage to the first ever VFX Supervisor. “George Méliès made a vocabulary that we still use today. He was an incredible magician and even knowing what we know today I had to look at his work sometimes four or five times before I figured out how he did it”, explains Legato.
“Getting the VFX right couldn’t have been more vital and Foundry’s software was critical to the success of Hugo,” concludes Henning.
Getting the VFX right couldn’t have been more vital and Foundry’s software was critical to the success of Hugo.
